
In SharePoint 2010 we can create two type of web parts.

Here we are going to use Visual Web Part template to create Connectable Web parts. In Asp.NET the Web Parts are communicated via interfaces this allows Web Parts to exchange information with each other at run time. This Interfaces will define the message structure which is passed between two connectable Web Parts.
Here are the steps we need to do to create a Connectable web parts .
Define the Interface that will specify the data we wanted pass or exchange from one web part to another web part.
Create Provider Web Part.
Consumer Web Part.
First Fire of VS.NET 2010 and create Empty SharePoint project.

Now Visual studio provides you to select Deployment options. Here we are going with Farm based solution. because Visual Web part can not be deployed in Sandboxed solution .
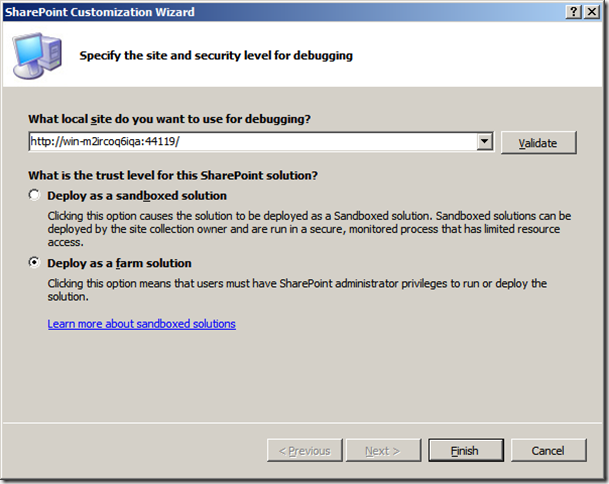
If you select Sandboxed solution and deploy to SharePoint you get the following error.

Now we need to add the Interface to our project . Here I am calling it ICommunicationChannel.
public interface ICommunicationChannel
{
int GetInvoiceId { get; }
}
Now we need to Add both Provider & Consumer Visual Web Parts .
In provider web part UI just add Dropdown list box.

Now add Consumer web part UI just add GridView control.

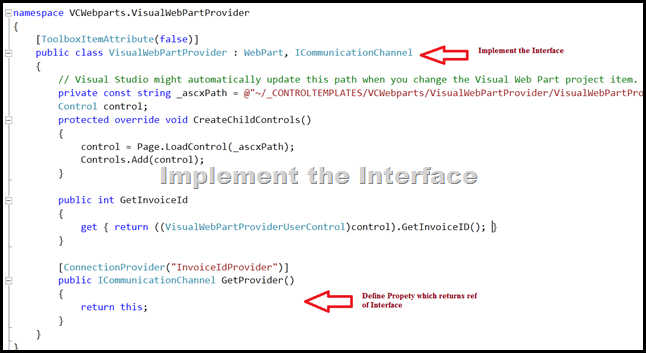
Now open of the Provider Web part and Add our Interface to Implement as shown here.
Now open of the Consumer web part and add method to receive Provider Web Part message.

I am using LINQ to SQL to connect my Data Source. Invoice and Invoice Line are tables from my Database.

Now we need to populate the drop down List box with Invoice ID’s from our Database table called Invoice Line.

In consumer web part we need to Query the Invoice Details information for the Invoice ID passed by Provider web part . [which is selected in Provider web part drop down list].

Now build the project correct it if any compiler errors and then deploy to SharePoint. Now go to the SharePoint site where you wanted add this web parts and test.
Click Edit -> Insert and select Web Part button from the Ribbon menu now select Custom from Categories ->select Provider web part-> click add button this will adds provider web part to the Page. follow the same steps to add Consumer Web Part as well .

Once Both Provider and Consumer web parts are added to the Page now we need to establish the connection between these two web parts. To do click Edit Web Part on Provider web Part you will see the connections and select Consumer web Part as shown below.

Here is the result of Connectable Web Parts.

No comments:
Post a Comment